

How To Draw Harley Quinn And Joker Step By Step
How to describe Harley Quinn

To me, the appeal of digital painting techniques are elementary. Unlike traditional media, I can create a slice of art without waiting for the paint to dry.
In my early days of working digitally, I had plenty of fun trying to get to grips with the software and while I explored more about digital media, it was as well interesting and challenging. I also worked on traditional media, which fabricated it easier for me to understand what to do with digital art software.
Mistakes will e'er happen forth the way, just I enjoy the process. Sometimes the calculator crashes while I'chiliad producing artwork, considering the memory is over capacity. That tin be painful, merely it works out in the end when a client is satisfied with the result and I go paid plenty to purchase a new computer!
And then don't be scared to make mistakes and set up to get through some creative pain. It will ease in time, and and then yous can wait dorsum at what you've been through... and smile. Enjoy the journey.
01. The initial thought
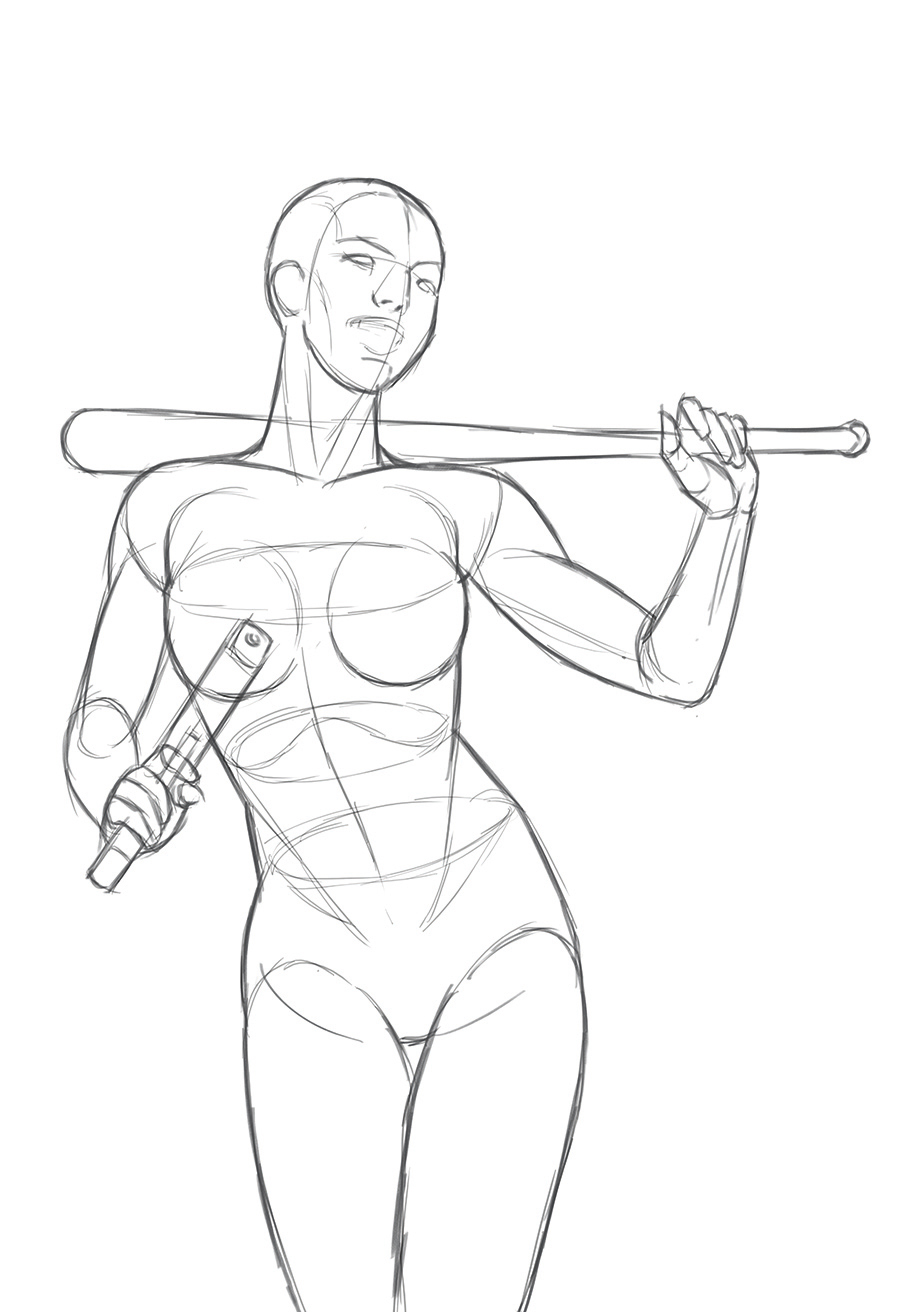
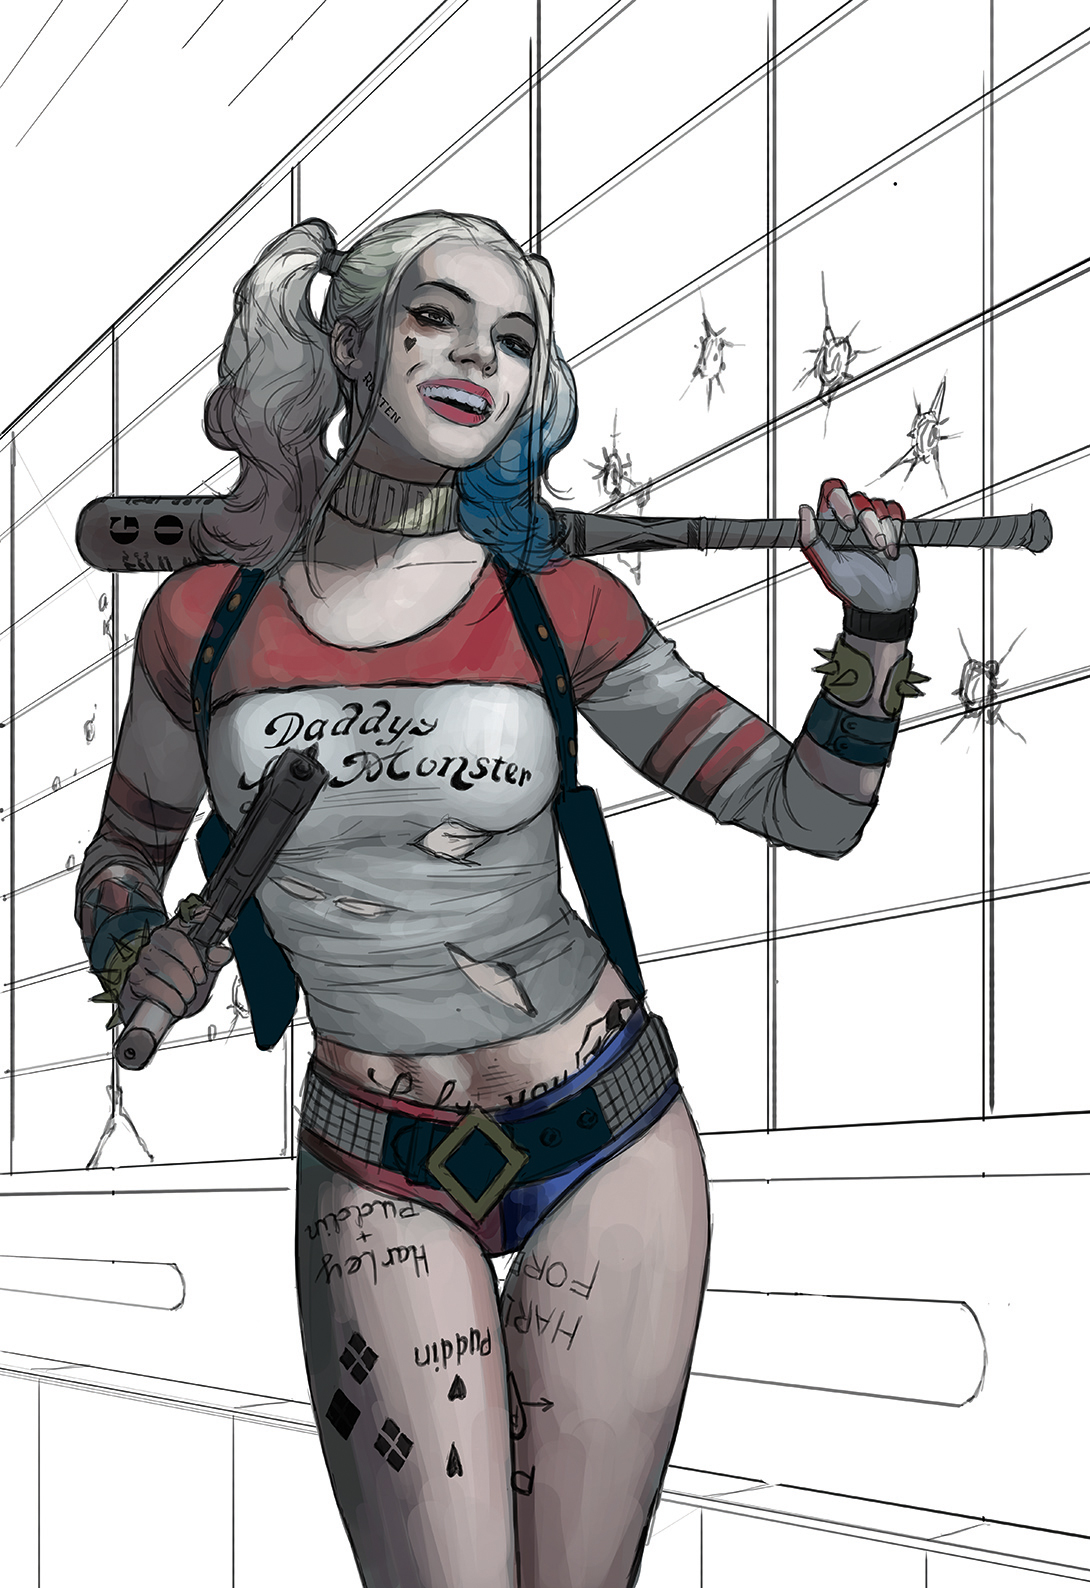
I already have an idea of how to pose Harley Quinn – it'due south pretty much what y'all see hither. Information technology's always difficult at the beginning to decide on what pose will be best, then I draw out a couple of options, and so cull the best. I place the rough sketch on a default layer in Photoshop with a white groundwork.
02. Build upwards the lines
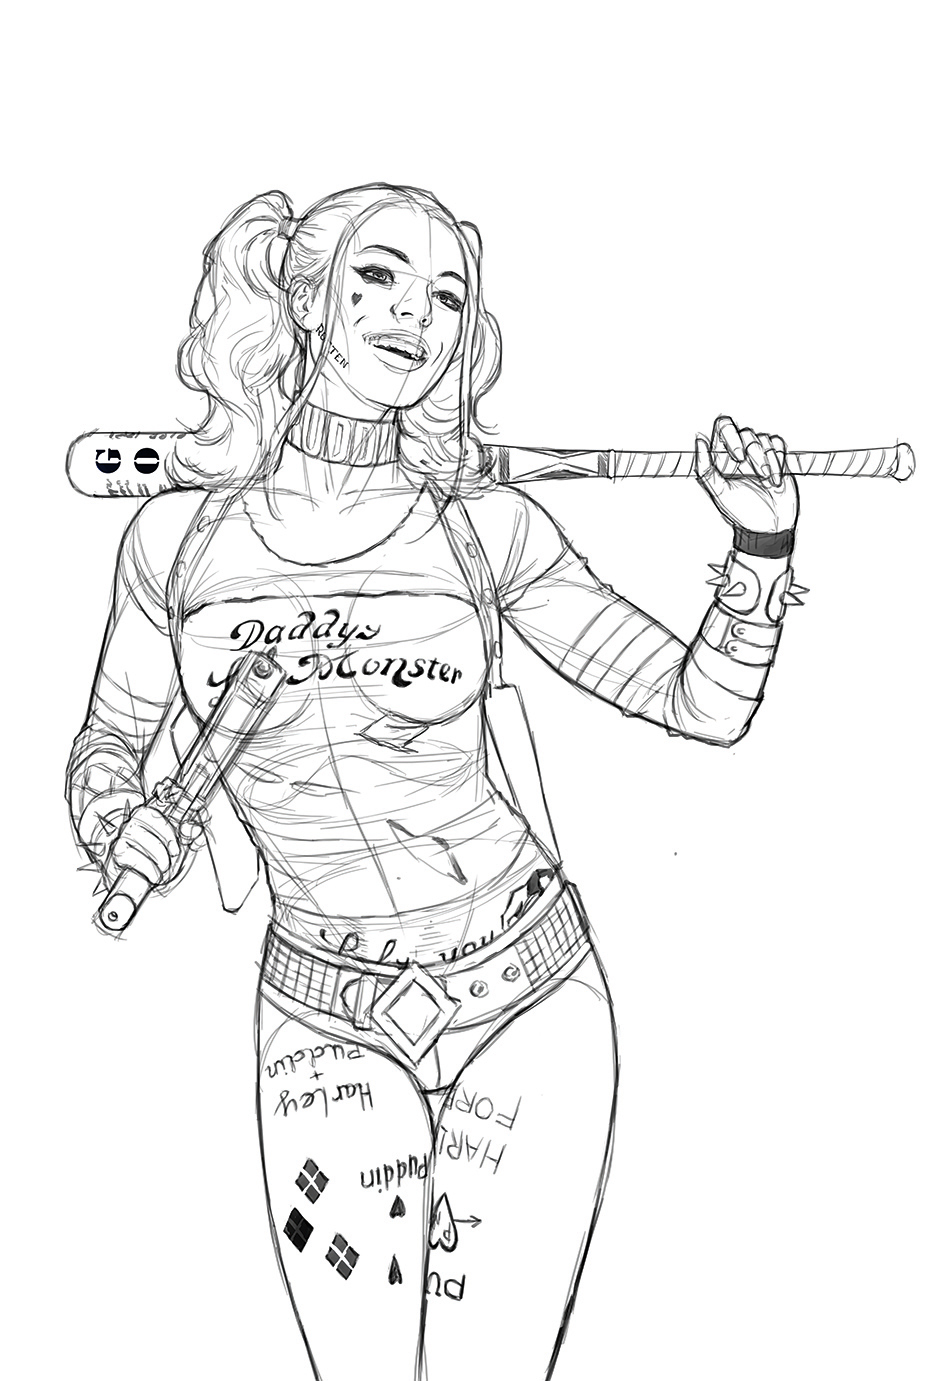
From the rough, on the aforementioned layer, I starting time to build upwardly the lines. For this procedure I utilize Photoshop's default hard Round brush. I draw what is needed for now, and add some relevant detail. But I also attempt and maintain the limerick's mood and momentum, into the next step...
03. Cleaning things up
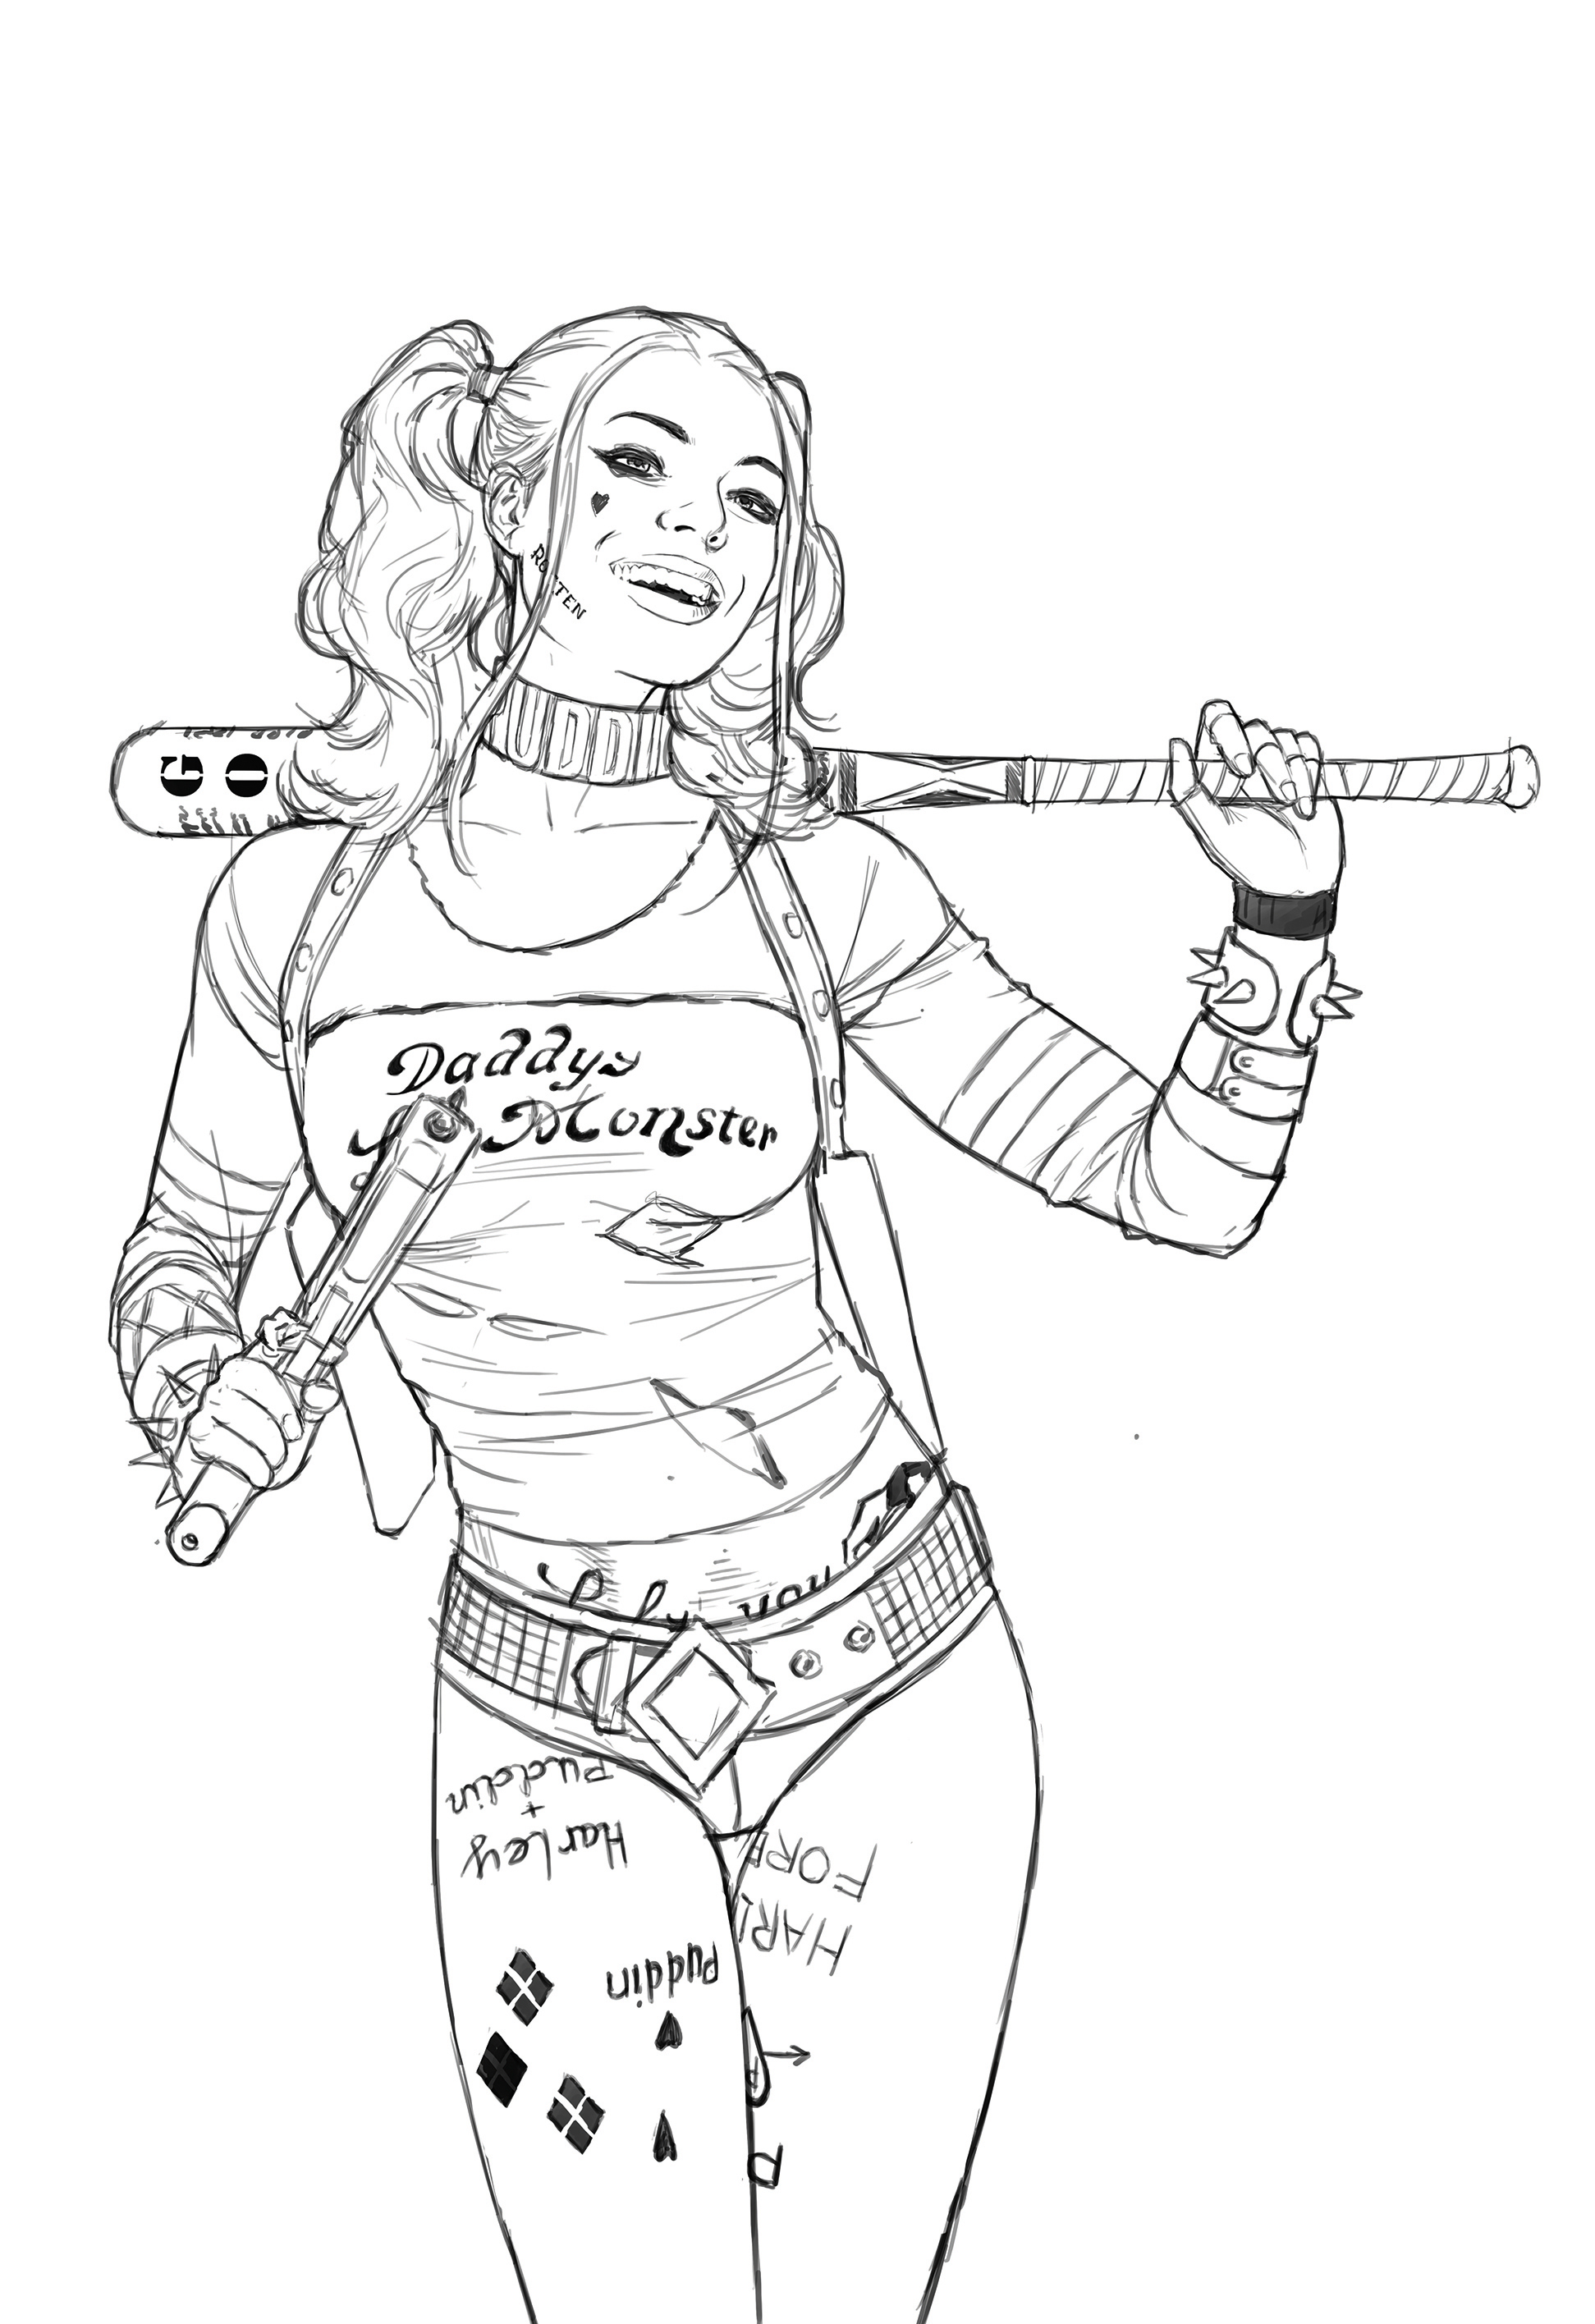
I add a new layer on summit of the overlapping line fine art, and then identify the original rough sketch above that layer, which makes it easier to edit if there are whatever mistakes in the process. Adjacent I start to clean up the lines, by tracing exactly along my original drawing of Harley Quinn.
04. Background considerations
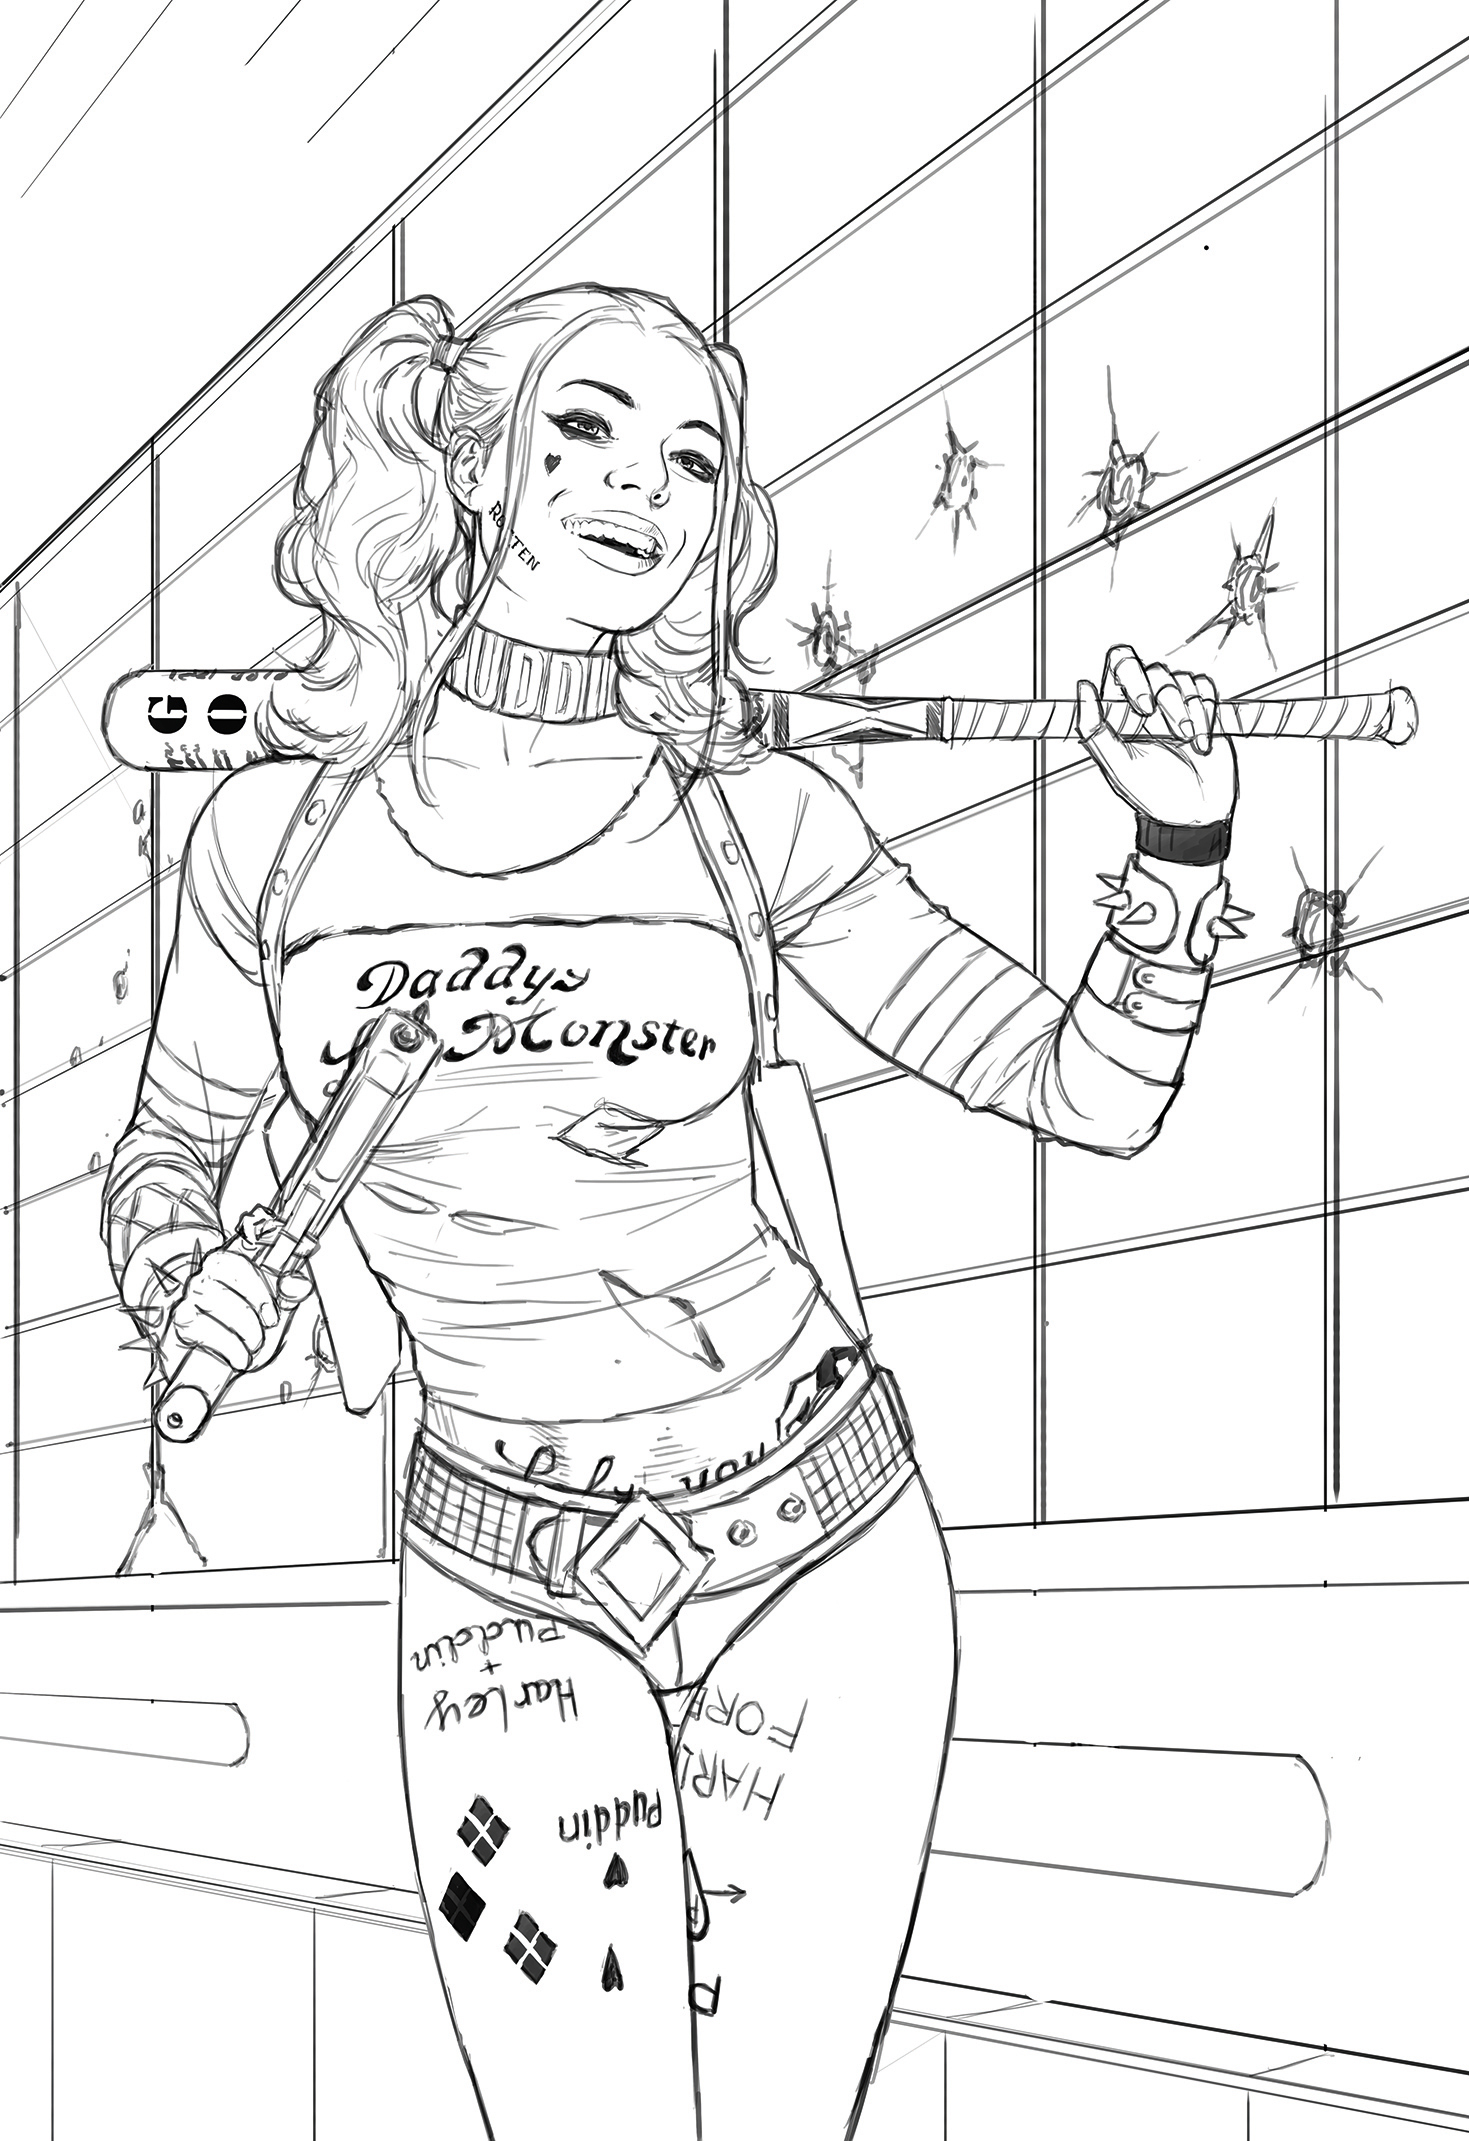
After finishing the character's lines, I movement on to the background. I introduce a grid to create a strong perspective and add more layers behind the figure, to ensure the groundwork is clear enough to make the grapheme stand up out. I'chiliad portraying Harley Quinn standing in a subway – she'due south hobbling and bloody, simply victorious. Her enemies' bodies are only out of shot.
05. Applying colour
Now it's fourth dimension for some color foundation. I add a new layer over again below the line art and the background layer, ready for some rough colours. I start with Harley. Using the hard Round brush, I place some color, working out where the light comes from and how much brightness I'll demand. This will help me when I return (add final detail to) the character.
06. Lighting the scene
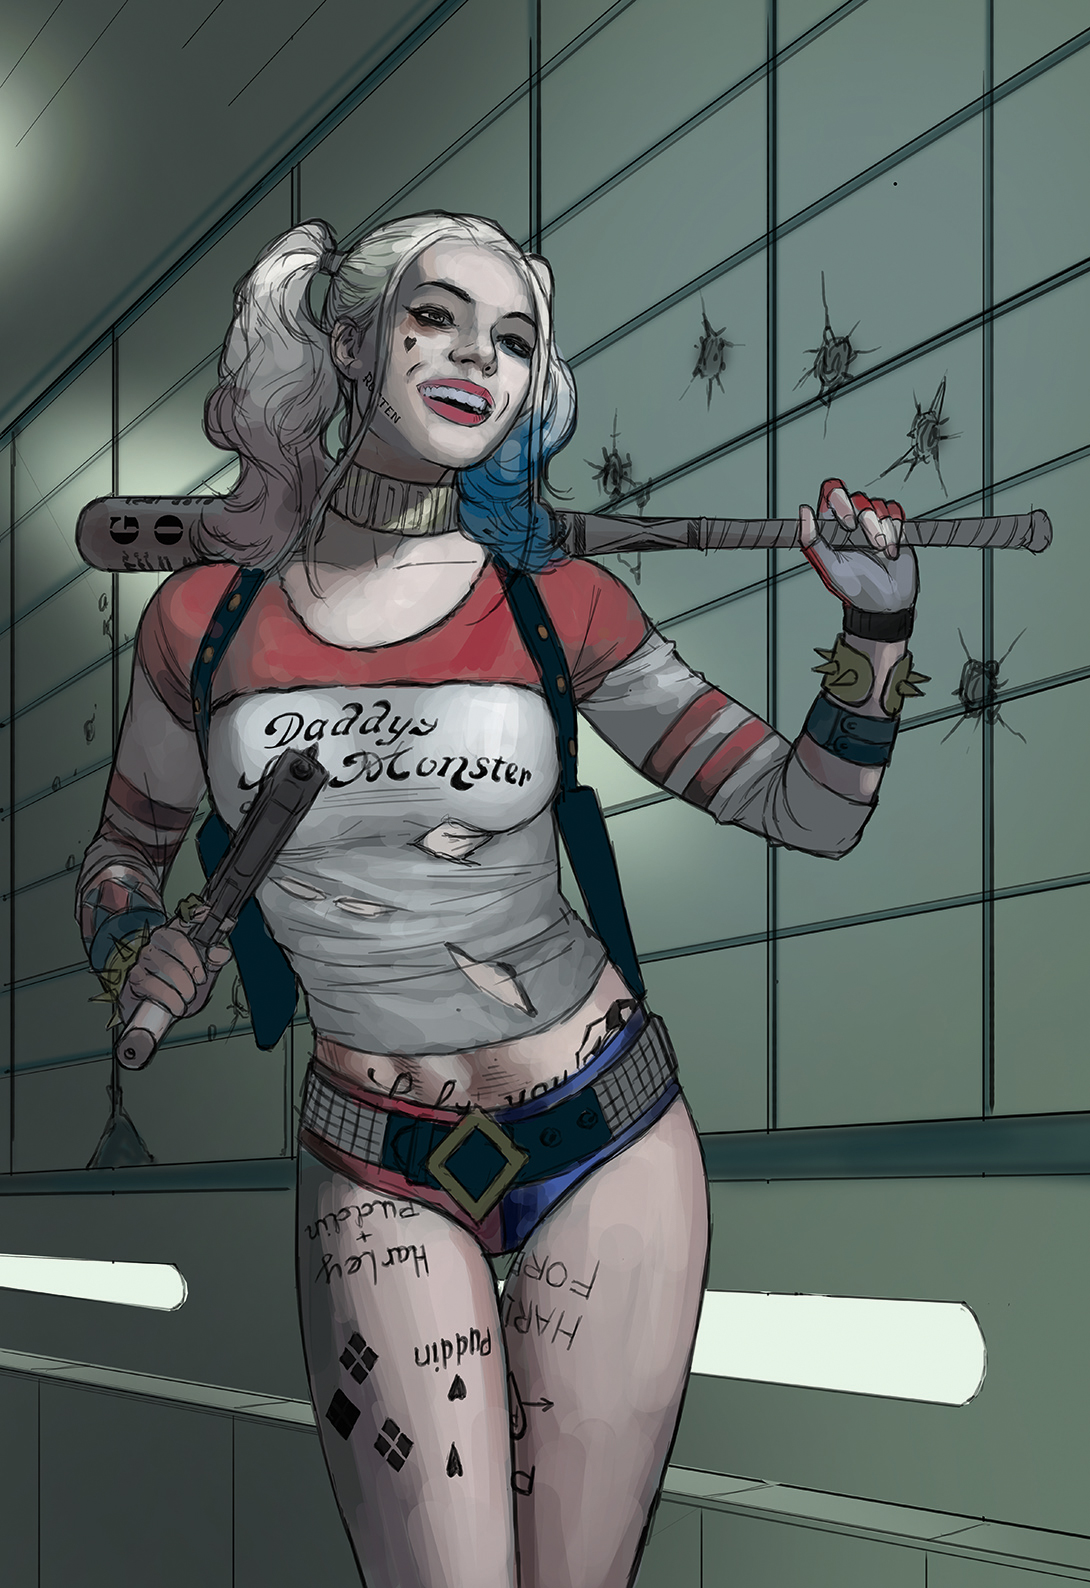
Next I roughly colour the background. Calculation a new layer below the background line, I use the Slope tool for speedily introducing a nighttime to low-cal graduation. So I paint a light source – not the main 1, simply a secondary source – which gives a certain mood to the character and will help explicate the ambient colour in the finished artwork.
07. Enhancing the confront
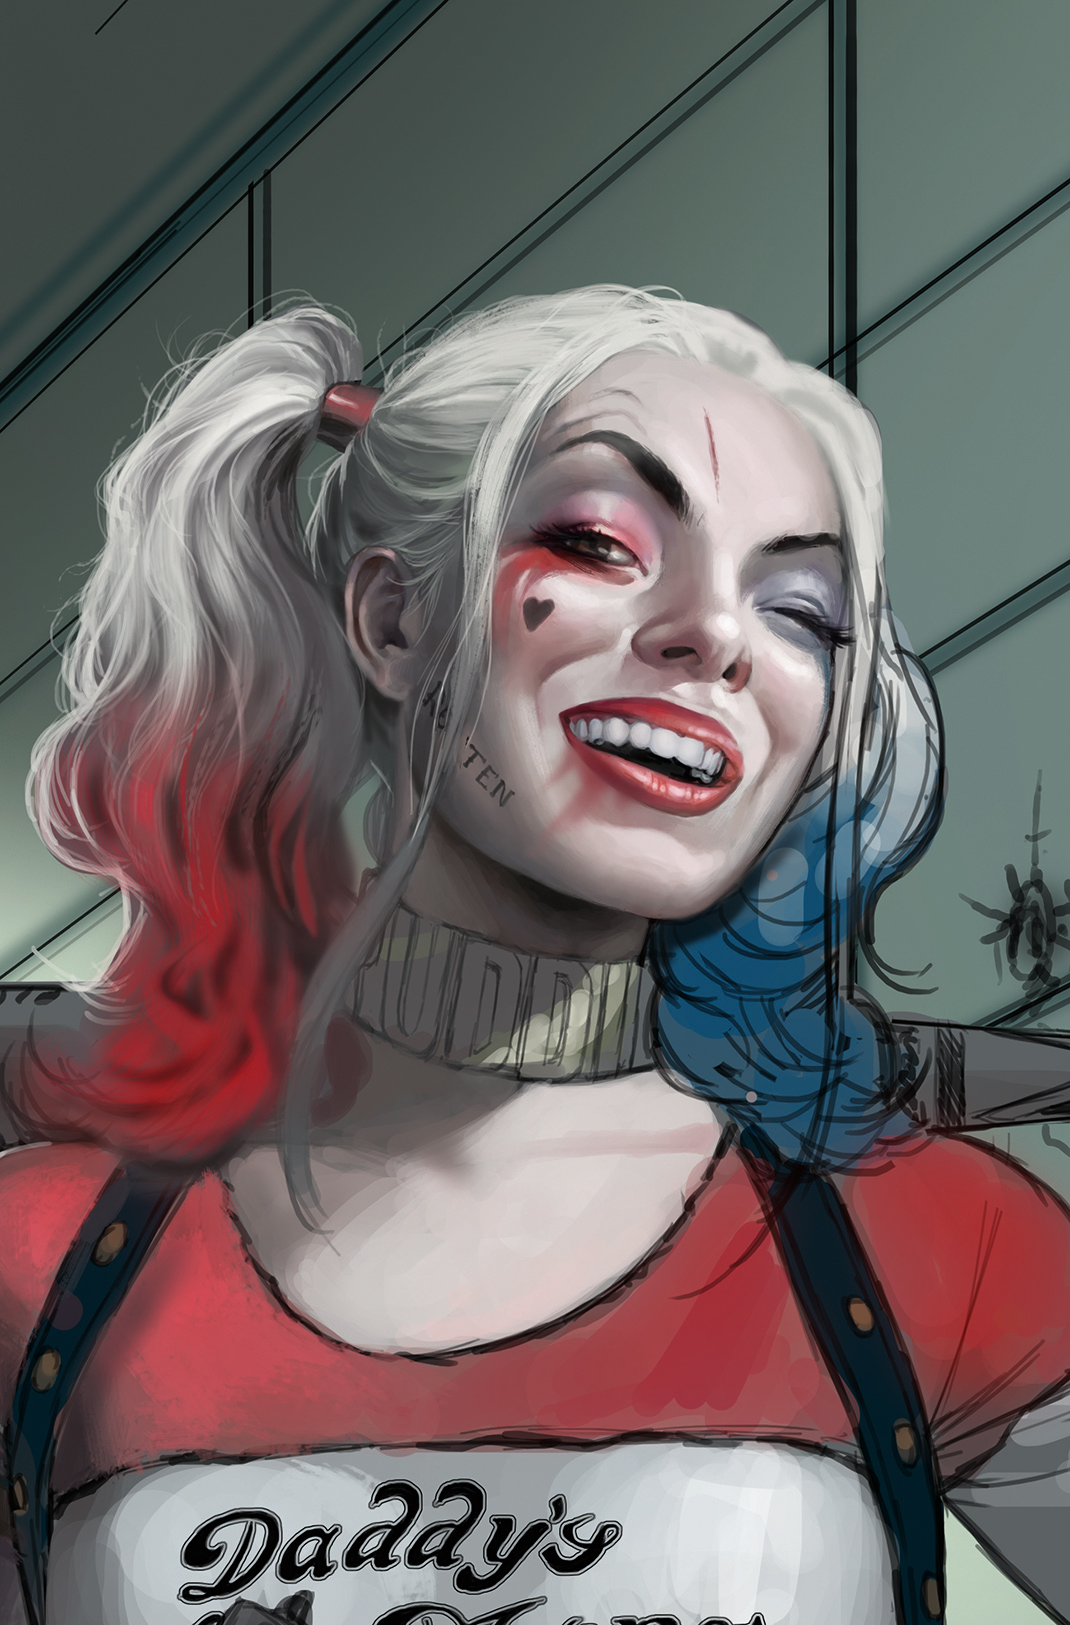
At present I start rendering Harley'southward face. I apply a soft Round castor for a smoother bear on and my custom brush I call Canvas 001, which gives the artwork a more painterly look and helps me blend areas delicately. I alter the eyes a fiddling, aiming to create more bear on with the viewer. This sort of modify can be washed whenever yous want effectually the rendering phase, really.
08. Rendering the character
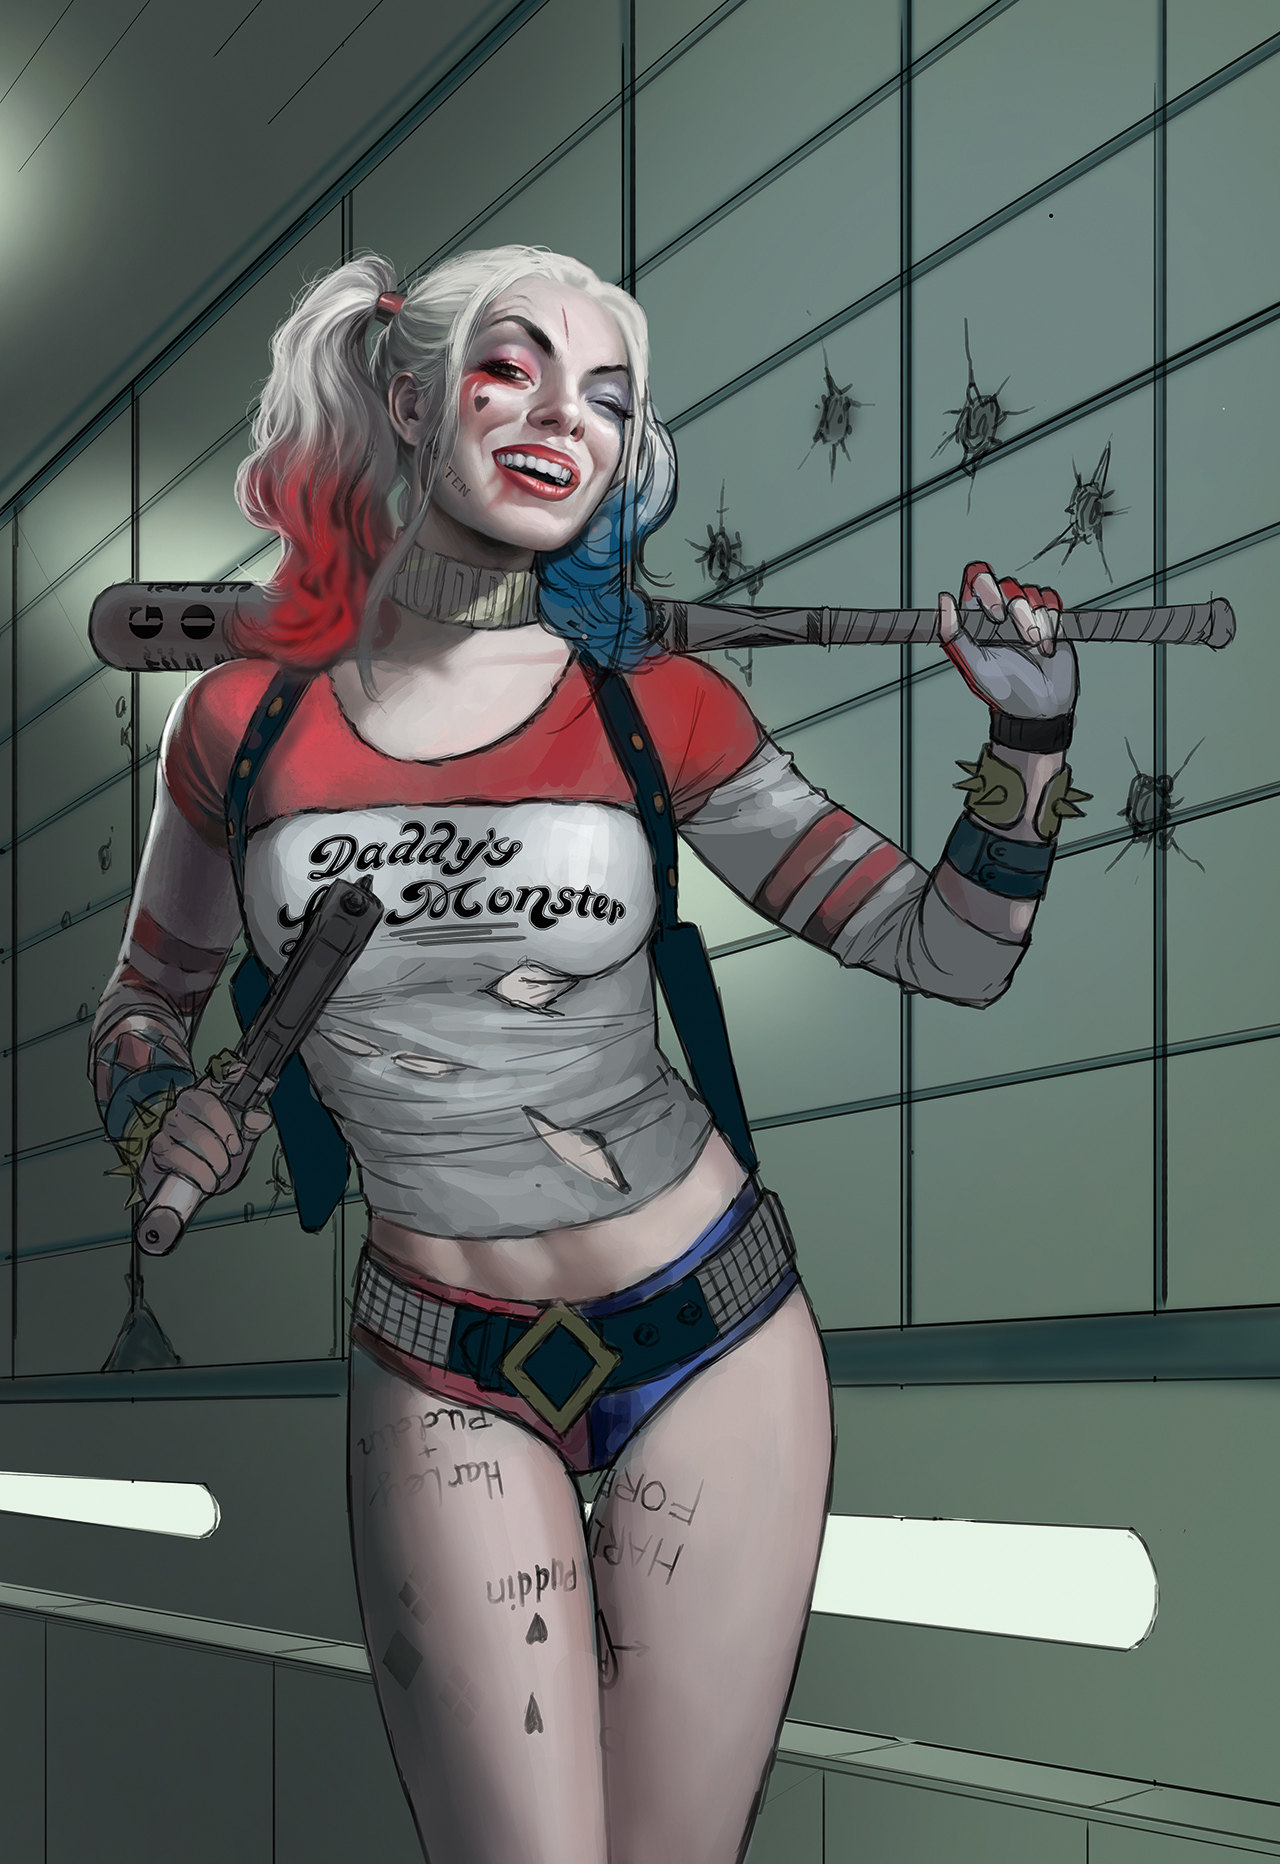
I go on to render the whole character, for now not worrying virtually the tattoos that are visible on the line art. I tin sort them out later on after the whole rendering process is done. I still employ the aforementioned brush for rendering the character.
09. Don't lose details
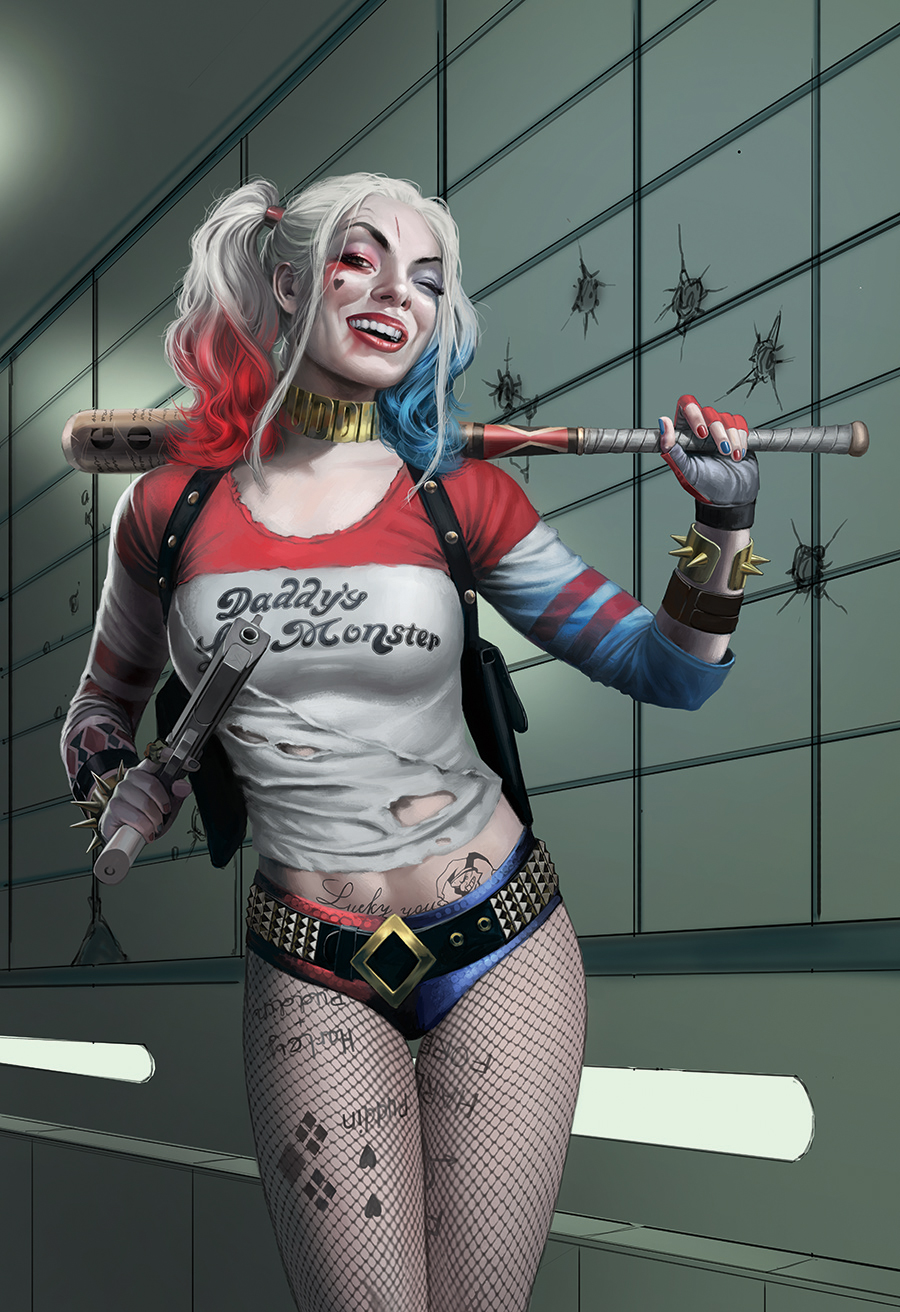
I realise that I demand to take more intendance when rendering my character. Because Harley Quinn is the subject of the illustration, I accept to be careful with tone, mid-tone and shadow. A heavy hand and my graphic symbol will suffer in darker areas and crusade a loss of paradigm detail. A delicate use of mid- tones is crucial during these final painting stages.
10. Last touches
Now information technology'south time to return the background. In this case, I use marble and granite textures to elevator the mood a little. Some details take to be fixed, and I paint over some unnecessary line work. I set and analyze the groundwork, and finally, add some lens flare upshot and dust textures, to increase visual interest.
This article was originally published in ImagineFX mag upshot 137. Buy it hither.
Related manufactures

Source: https://www.creativebloq.com/how-to/how-to-draw-harley-quinn
Posted by: nevillehalight.blogspot.com
0 Response to "How To Draw Harley Quinn And Joker Step By Step"
Post a Comment